Did you know that dreamcatchers are protective talismans from Native American cultures?
Native Americans believe that dreamcatchers act like a spider’s web, filtering good dreams and catching the bad ones to destroy them with the first rays of the sun. They are traditionally hung above cribs or children’s beds to prevent nightmares. Isn’t it charming?

There are a thousand different designs. The originals are made with natural materials, following tradition: hemp rope, colored thread, bird feathers, stone beads…
We propose our own version of a dreamcatcher made with crochet, some beads, and colored ribbons. Are you ready to create this DIY?
Materials you need to create the children’s dreamcatcher
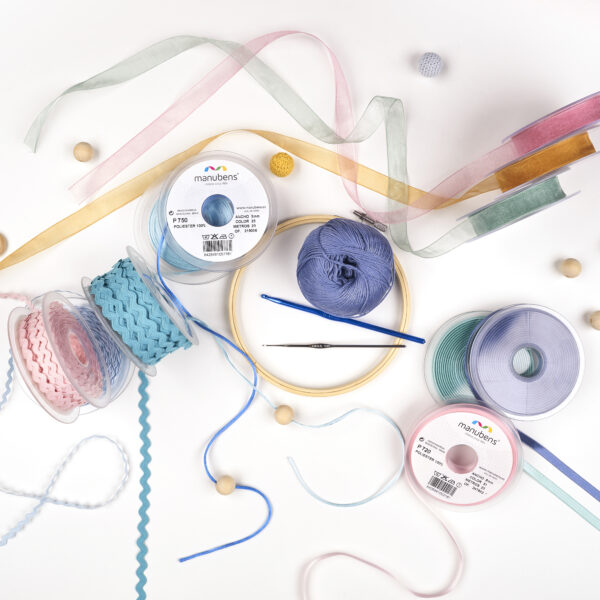
- Hoop (we have chosen one with a diameter of 14cm on the inside)
- Wooden ring for the center (it is recommended that the inside is not wider than 2cm)
- Crochet thread for the net and the appropriate crochet hook
- A crochet hook for the rat tail
- Wooden beads or crochet beads
- Some lace
Our choice of Manubens ribbons:
- Rat tail ribbon: P750 in colors 25 and 73.
- Velvet ribbon: P950 width 16mm in colors 8 and 724.
- Organza ribbon: P850 width 15mm in colors 87, 533, and 73.
- Satin ribbon: P720 width 8mm in colors 12, 31, and 70.
- Wave ribbon: P5500 in colors 41, 54, 570, and 602.
Step 1. Cover the small hoop with crochet
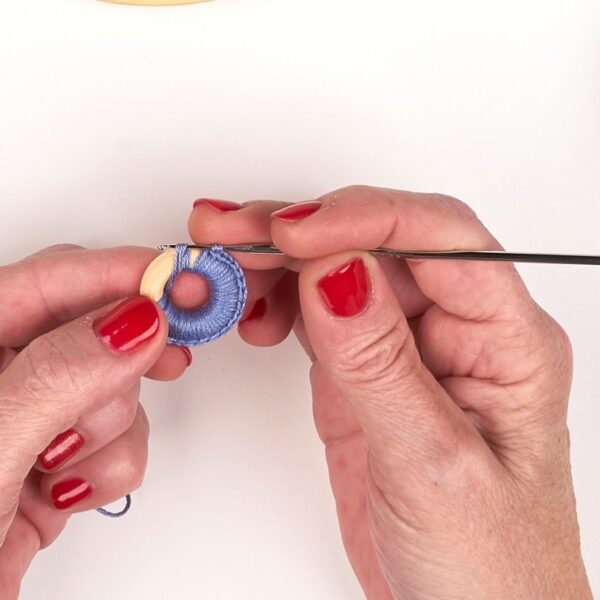
First of all, start by surrounding the wooden center ring with slip stitches as you can see in the photo.
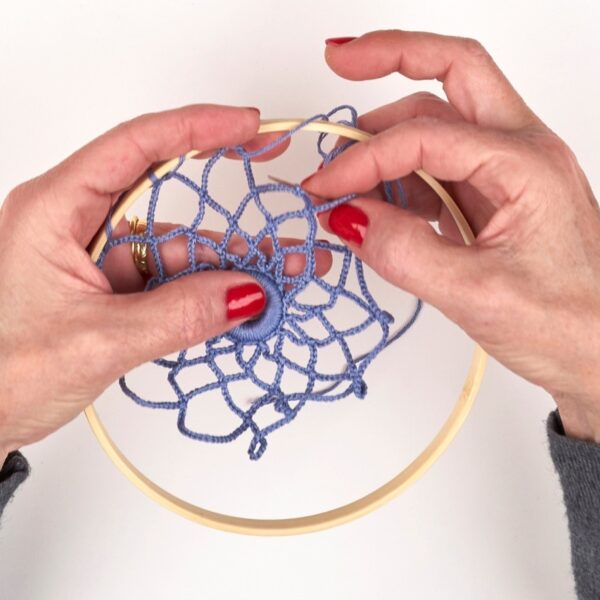
Now that you have the base, you can start crocheting the dreamcatcher net.
Step 2. Start the first round of the pattern

With a chain stitch, make arcs of 11 stitches and join them to the hoop according to the scheme we provide below, leaving the same number of stitches for each arc.
Step 3. Third, fourth, and fifth chain stitch rounds

Following the pattern of 11 stitches, make the third round centering the arcs according to the scheme. The fourth round is done with arcs of 15 stitches, and for the fifth, you have to count 23 stitches (you’re almost done seeing your dreamcatcher finished!)
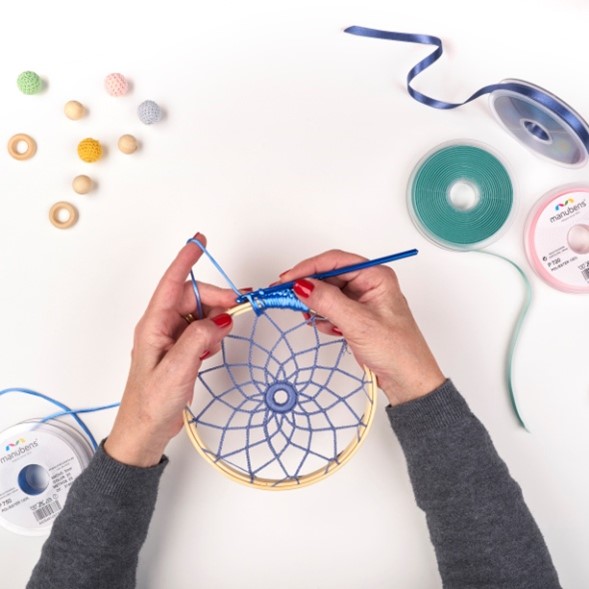
Step 4. Sew the net to the hoop
To sew the net to the hoop, take the central point of each arc and stretch it well until it is attached. It should be tight and firm.
Step 5. Place the hoop and cover it with rat tail

With a crochet hook suitable for the thickness of the rat tail, surround the hoop with slip stitches and finish when you reach the end.
Step 6. Place the ribbons and beads
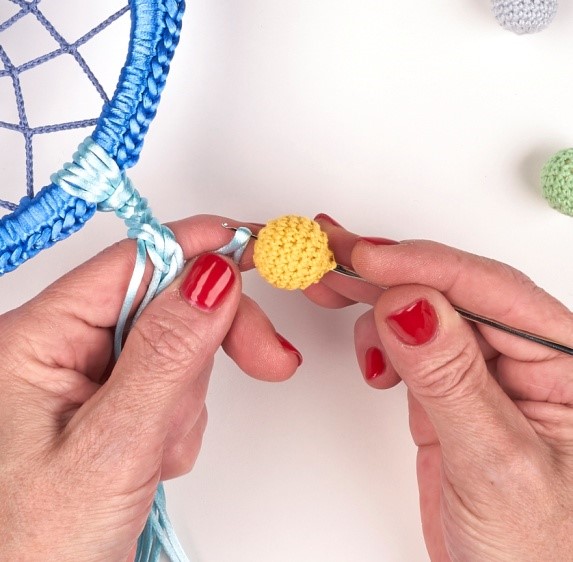
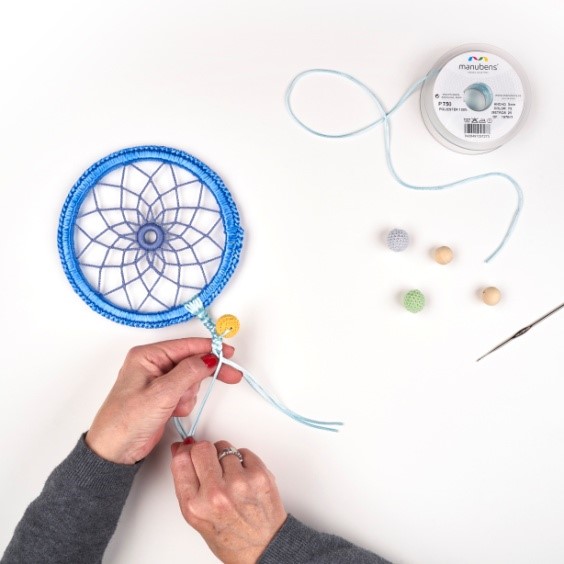
With the rat tail, you can make a 6-strand macramé braid to hang the beads. You can also hang them from the lace or any of the ribbons you have chosen for your craft.
Step 7. Distribute the ribbons all over the hoop

Distribute the ribbons all over the hoop, combining textures, widths, and colors to create the effect you like the most.
With the rat tail, you can make a loop to hang on the wall. If you prefer to prepare it to hang from the ceiling like a mobile, tie three long sections distributed around the hoop, join them at one point, and place a loop.
And your dreamcatcher will be finished and ready to hang!

Our recommendations to finish:
- You can choose a wooden hoop and a larger frame if you prefer to make a larger dreamcatcher to hang from the ceiling like a mobile.
- We have suggested these Manubens ribbons, but in your usual haberdashery, you will find the color combinations you like the most.
- Even if you have no experience with crochet, don’t hesitate to try. Slip stitches and chain stitches are very easy, and the haberdashery will be happy to help you.
- If you are thinking of giving a handmade craft and don’t know which one to make, this dreamcatcher can be a good idea
If you are looking for easy and simple gift ideas, we encourage you to take a look at these summer jellyfish keychains. If you decide to make this dreamcatcher or any other DIY from our blog, we would love to see the result: use the hashtag #Manubens on your social media
View this post at Instagram