
How to Make an Elegant Clutch Step by Step
Who said clutch bags were reserved only for weddings and special occasions? Star accessories in the world of fashion, clutches add a special touch to any look. We have combined these colors and textures to be able to use this DIY bag at any time of the day and with any outfit. Do you dare to propose it in your haberdashery workshop?
Materials needed to make the fabric clutch

Manubens ribbons for decoration
- Petersham P.495: 10mm width in color 1: 4mm width.
- Linen P.320: 15mm width in color 705
- Lamé Onduline P.5200: 3mm width in color 94
- Onduline P.5500: 2mm width in color 20
- Coverpoint P.1067: 26mm width in color 71
Manubens ribbon for the handle (optional)
- Linen P.320: 15mm width in color 0
Manubens ribbon to embellish interior seams
- Linen P.320: 15mm width in color 0
Other materials
- Linen fabric or any fabric to the client’s liking
- Zipper (matching the width of the bag)
- Beads
- Scissors, needles, thread, and sewing machine
Tutorial for making a clutch bag
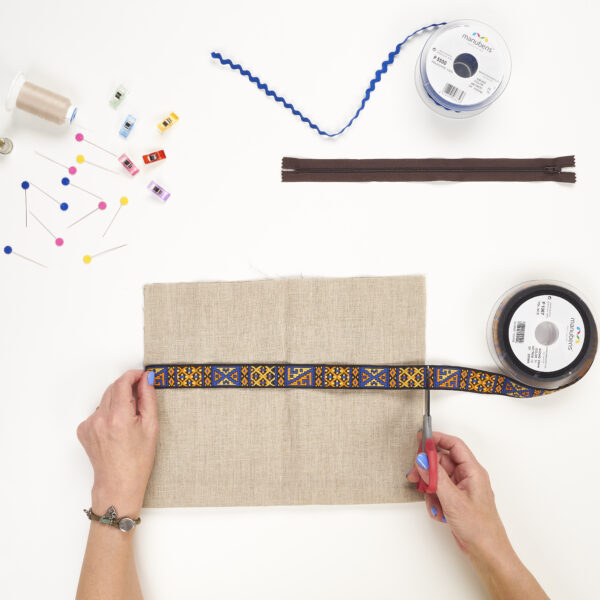

Cut two strips of 50 x 30 cm from the chosen fabric to make the bag, in our case, linen. Also, cut 30 cm from each decorative ribbon.
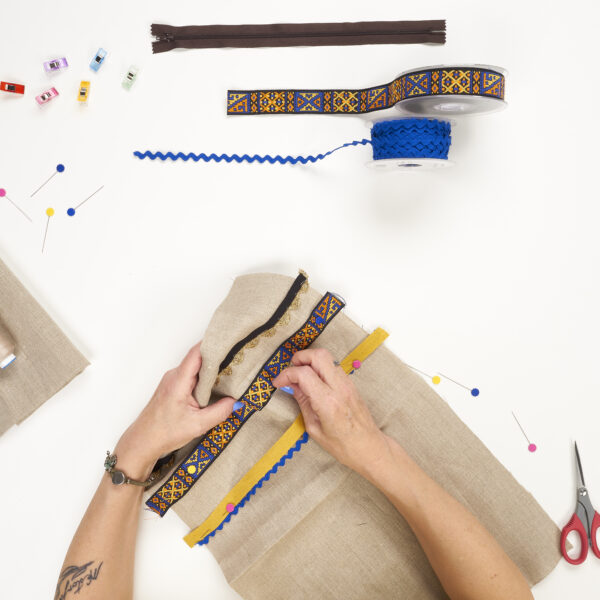
Once we have the ribbons arranged to our liking, baste them on one of the linen fabrics…

Place the zipper inside out.

Place the other piece of linen fabric on top, right sides together. Baste and sew the zipper.
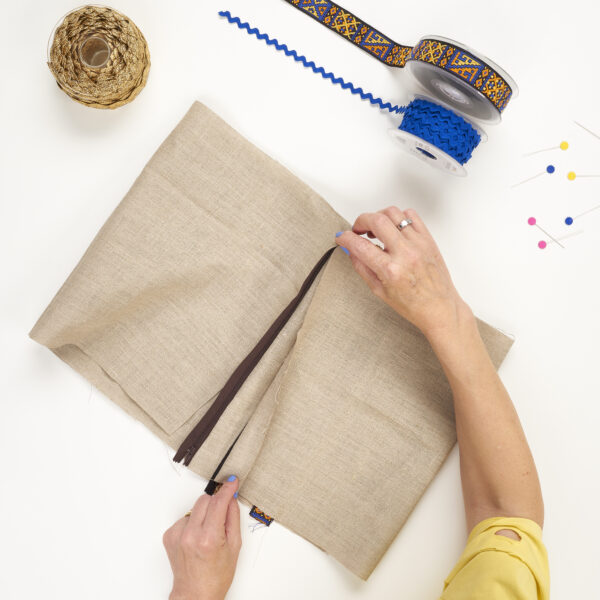
Fold the fabric in half. Baste. Open the zipper and sew both sides.

Turn the bag inside out. Present the beads and sew.

To make the handle, cut 30 cm of linen ribbon and sew it on the right side to the side of the clutch.

Open the zipper and turn the work.

Baste and sew the sides.

To embellish and cover the interior seam, place linen ribbon and sew.

Turn the clutch and it’s ready!
We now have our clutch for any occasion. Elegant and summery, it will be a must-have in our wardrobe.
This has been our proposal, which we hope serves as inspiration for each person to design it to their liking.
If you would like to see another gift idea, we also show how to make a fabric tote bag on our blog.
Use the hashtag #Manubens on your social media so we can see your creations.
Ver esta publicación en Instagram