
Customizable DIY to Adorn Your Wrist
Summer is just around the corner, and we all feel like adding some color to our lives to break the monotony of the long winter. It’s time to showcase casual, colorful bracelets to celebrate the warmth, the sun, and the holidays!
In this post, we’ll show you how to make bracelets with mouse tail cord to give a special look to your summer wardrobe. You can create them with your favorite colors or ones that match your bikini or swimsuit, as they can get wet without fading. Cool, right?
Moreover, these bracelets are very easy for kids, and you can keep them entertained on a summer afternoon. Because they, too, love practical crafts that they can later wear or give to their friends.
In this article, we’ll explain:
-
Materials needed to make mouse tail bracelets
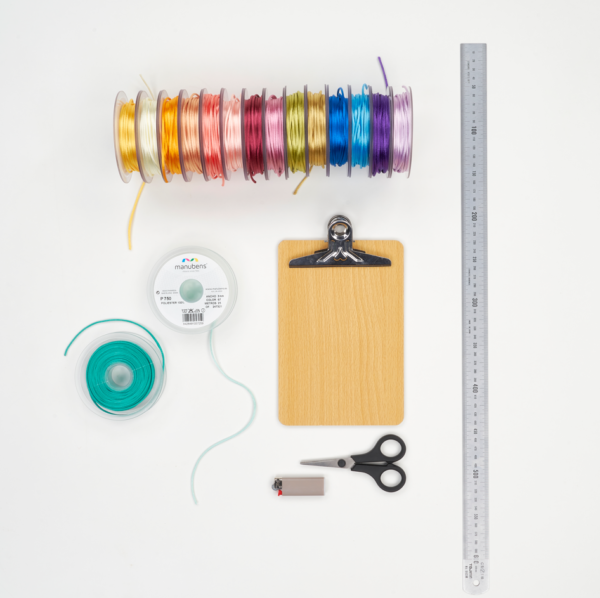
To make these easy mouse tail bracelets, you’ll only need:
- Mouse tail cord P.750 Manubens in different colors.
- Scissors
- Lighter
- Folder with clamp to hold
- Measuring tape
2.How to make mouse tail bracelets step by step
Now that you have all the materials ready, let’s start the tutorial to learn how to make mouse tail bracelets. Did we mention it was very easy? You’ll see for yourself right now.
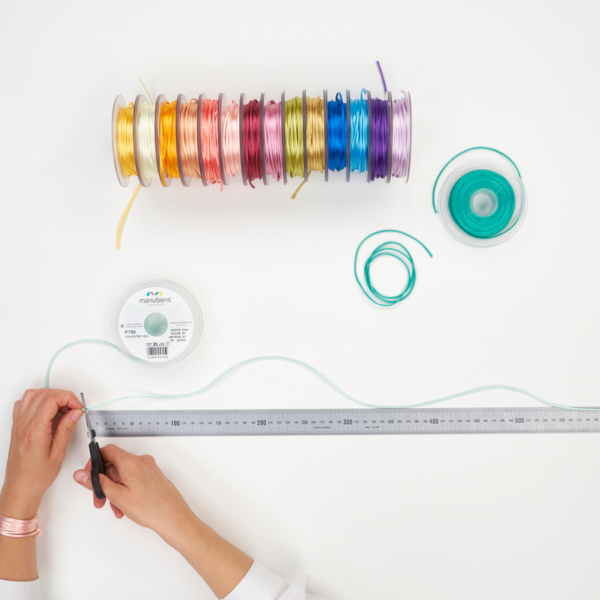
Start by cutting two pieces of about 70 cm of mouse tail cord in two different colors that you like. In the photo, you can see different colors of Manubens mouse tail cord so you can combine your favorites.

Measure 8 cm from the end.

Tie a knot leaving an 8 cm margin, as you can see in the photo.

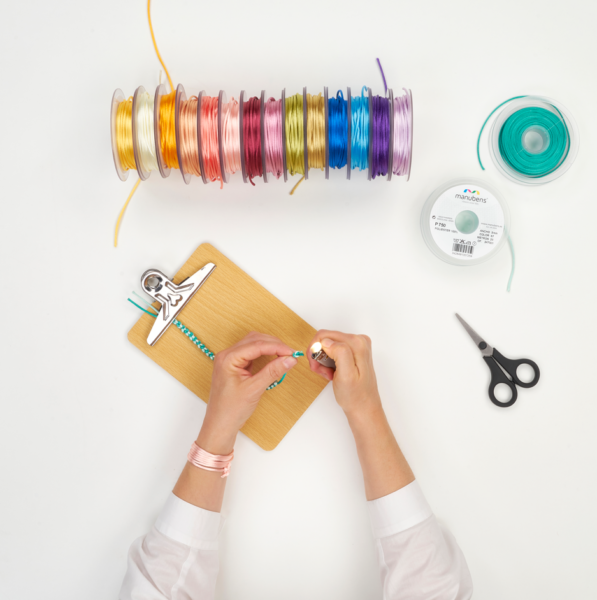
Hold the cords by the knot with the folder clamp to start working on the bracelet. Separate the two cords and pass the left one (dark green) over the right one (light green).

Pass the dark green cord under the light one and then through the center of the hole. Tighten the cord and pull it up.


Repeat the process once on each side, each time with a different color.

Measure the wrist. If the bracelet is for a girl or boy, you’ll need to weave less. When you have the length you need, leave an 8 cm margin and tie a knot at the end.
Cut the excess cord and burn the ends to secure the knot and prevent fraying.
Remove the other end of the clamp, undo the knot you made at the beginning, and redo it at the end of the cords, leaving an 8 cm margin. Just like in the previous step, burn the ends.

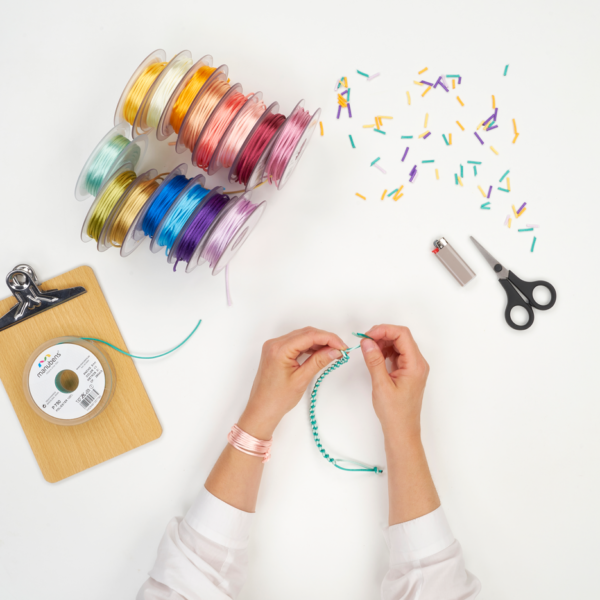
Now it’s time to make the closure with flat knots. Round the bracelet with your fingers, leaving one knot up and the other down.


Pass a piece of dark-colored mouse tail cord under the 4 cords, and the piece remaining on the right, pass it over towards the left.
The cord we had on the left passes over the cord coming from the right, and this one passes under the four cords and comes out through the hole formed on the right, then tighten (you can see the step-by-step reel on our Instagram @manubens.cintas).

Repeat the process once on each side until you have 4 knots, and cut off the excess.

Burn the ends slightly to secure the knots, and the bracelet is finished.

Easier than that is impossible. Do you already know what colors you’re going to use? Blues like the sea or yellows and oranges like the sand and the sunset? Why not play with the range of pinks and dark red? A mix of colors that goes well with everything at any time, as we have done. Are you ready to try it?
3. More ideas to finish mouse tail bracelets
Would you like to customize the bracelets and give them a special touch? You can buy jewelry ornaments you like and intersperse them as you weave. In specialty stores, you can find medals, miniature seashells, beads, marine anchors… Any ornament will look great. You can even add some glass beads before making the final knot to hear them tinkling as they collide.
4. Have leftover mouse tail cord? More crafts to make the most of the leftovers
Now that you’ve learned how to make bracelets with mouse tail cord, you probably have leftover pieces in some colors. Don’t worry. Mouse tail cord is a very versatile material that you can use to make a bunch of fun crafts.
On our blog, we’ve posted two ideas that you’ll love. Beautiful jellyfish keychains for the different keys in the family and a dreamcatcher. If you like sewing or are learning to sew with a machine, the jellyfish keychain craft is perfect to get started in this technique, as you don’t need a big machine – the little one at home is more than enough. You’ll see that it’s not difficult at all, and we explain it in detail, step by step.
Did you know that dreamcatchers are used by Native Americans to catch children’s nightmares? Would you like to know how to make a beautiful and original one, and also learn how to crochet? We show you everything in the post where we teach you how to make a dreamcatcher so you can practice the most basic stitches: the slip stitch and the chain stitch. You’ll find a diagram with the drawing so you don’t get lost, but you’ll see that it’s easier than you think.
If you don’t want to miss any ideas we post on the blog, follow us on our social media. And don’t forget that we’d love to see your finished crafts! If you feel like it, share them on your profile with the hashtag #manubens and be part of our crafts community. We’re waiting for you!