
DIY to Decorate Children’s Room
They say that dreaming of flying is related to freedom and our future projects. Flight symbolizes detachment from the daily grind and directs us towards our life goals and desires.
We have all dreamt of flying at some point, even as children. It’s a fantastic dream that leaves us feeling refreshed and full of energy upon waking.
These kites that we will learn to sew are intended for children. If one of their birthdays is approaching, this DIY can be ideal as a gift—surely, they will love having them hanging from the ceiling or on the wall of their room!
Materials needed for children’s kites
- Cord P.200 Manubens, 8mm width, and color number 3.
- Linen Ribbon P.320 Manubens, 25mm width, and in colors 0, 416, 70, 629, 638, and 705.
- Colored cotton fabrics.
- Quilted thermoadhesive interfacing.
- Paper or cardboard to make the pattern.
- Scissors.
- Sewing machine with the appropriate thread according to the fabric color.
How to make the kite with fabric ribbons: step by step
The first step is to cut the diamond-shaped pattern on paper or cardboard. Our kites measure 20 x 30 cm, but you can make them any size you want.

Place the pattern on the fabric, folded in half, and cut.

Repeat the operation on the interfacing and cut it as well.

Now that we have the three pieces of fabric, iron the interfacing onto one of them.

Cut 30 cm of cord to make the ring that will serve to hang it on the wall.

Fold the cord in half (15 cm) and attach it to the right side of the fabric at the top.
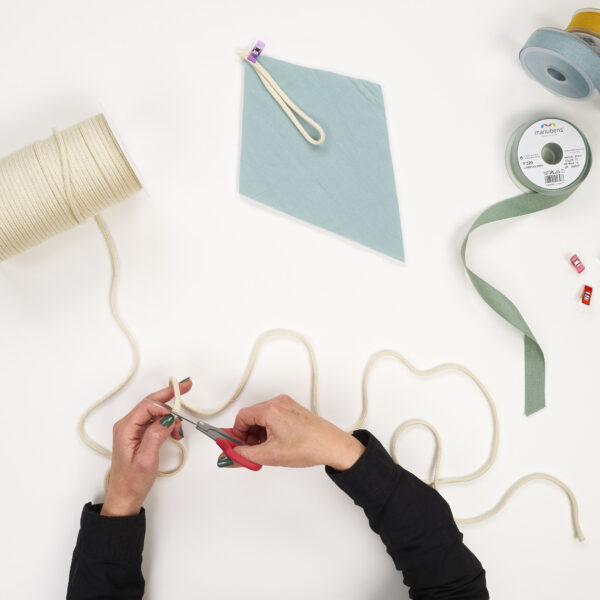
Now cut the tail of the kite. For this, you need a strip of cord 1.5 m long.

Attach the tail on the same right side, just at the opposite end.

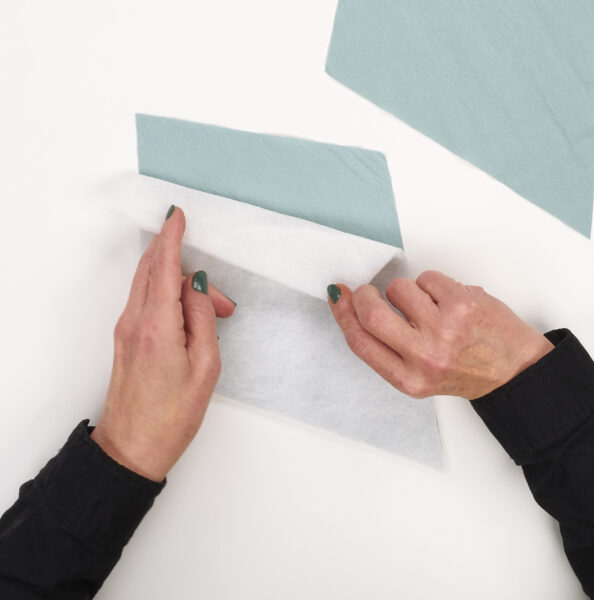
Now place the other piece of fabric on top, right sides together, letting the 1.5 m cord come out.

Sew the entire edge with a sewing machine, leaving a 4 cm margin unsewn to turn the piece inside out. If the kite is larger, leave a looser margin to turn it comfortably.

Turn it inside out using the cord and passing the fabric through the space you left unsewn.
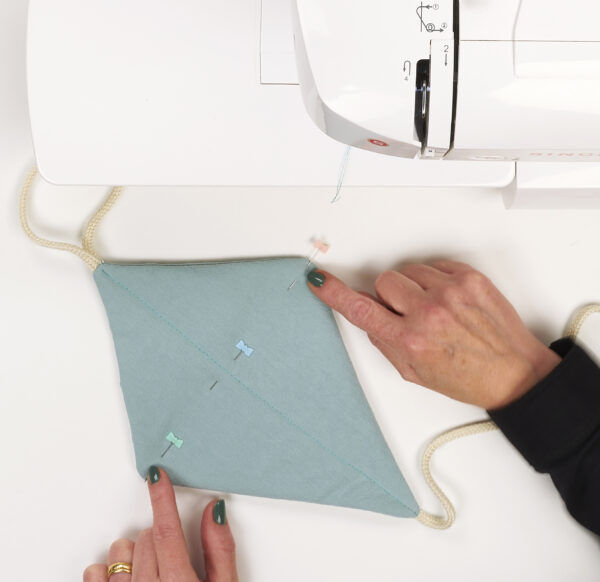
Once turned, it will look as shown in the image. Sew the remaining 4 cm to close. We make a cross-shaped backstitch that joins the vertices of the diamond and then we iron it.”
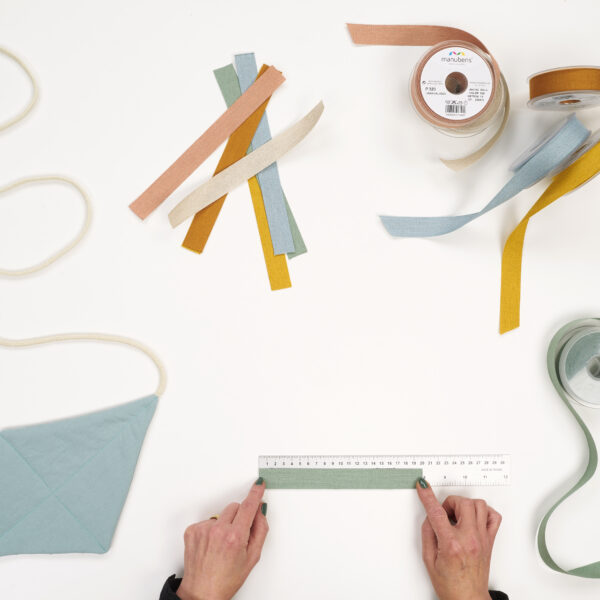
To make the bows for the tail, cut strips of 20 cm of linen ribbon in different colors.
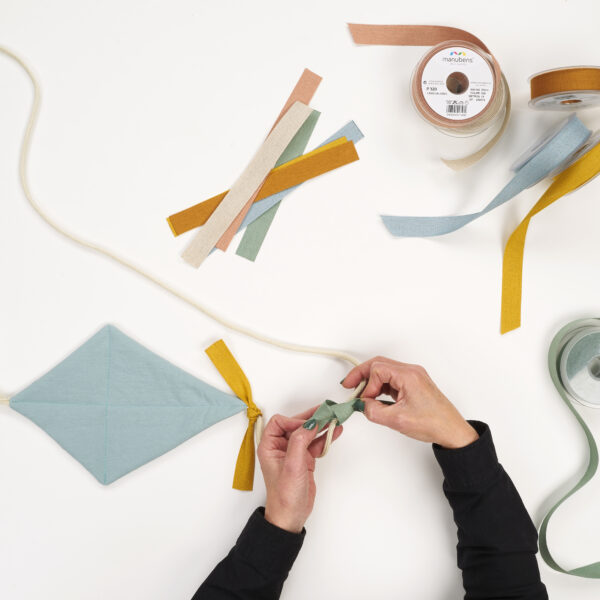
And tie them on the cord. The quantity is up to each individual’s preference.

There you go! By following these steps, you have the decorative kite finished.
The kite can be made in any size and with fabrics and colors that suit each person’s taste. Experiment with different colors and shades.
If you are interested in decorative DIYs, in this article, we show how to make a special dreamcatcher for children that is very easy to make.
Are you ready to create these decorative kites? Use the hashtag #Manubens when you share your creation on social media: we would love to see the result.